In a recent webinar we covered how to use RunSignup’s free RaceDay CheckIn app’s label printing feature. This feature helps to streamline packet pickup and reduce potential confusion. Races can customize the content on the labels to include information such as a participant’s name, age, division, bib number, shirt size, swag information, etc. There are a lot of features available within the CheckIn app, and this is one that we recommend timers and races look into using, especially if you are using dynamic bib assignments.
The webinar covers how to set up label printing, troubleshoot common issues, and optimize this tool for efficient packet pickup during your events.
Selecting the Label Printer:
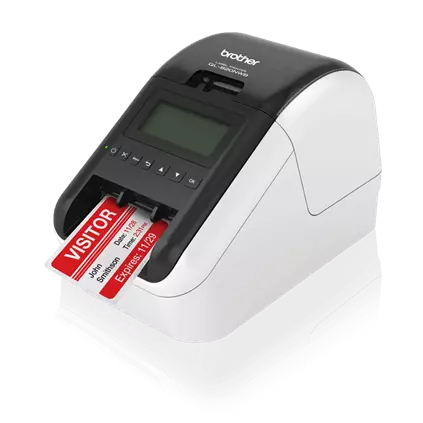
First, it is important to select the correct label printer and understand any limitations it may have. We recommend the Brother QL 820 NWB. This newer model, compared to the the QL 810, has the advantages of Bluetooth connectivity (for Android devices) and simplifies the WiFi setup aspect. However! If you are using iOS devices, the Bluetooth functionality does not work (AirPrint does not support Bluetooth). So, keep this in mind. The other advantage with the 820s newer model is the new LCD screen. It allows you to see what you are printing and if you are having issues with connectivity, which we find to be very helpful.
Setting Up the Label Printer:
We recommend you follow the instructions provided with the printer you purchase, but here are some high level instructions to get you started based on Brother’s QL 820 NWB.
- Plug in the Printer: When you plug in the printer, you may need to setup the date and time.
- Select OK twice to print a label to test that it is working.
- Push Menu to Select different settings. Select WLAN and turn this on. This is to connect using a wireless local area network.
- Push Menu again. Then, select Network Mode. This is how you actually connect to your WiFi account. You will see some options here and you can choose which option you’d like. However, the typical is to select the Infra/Direct Mode and then the Infra Manual Setting option to view a list of available WiFi connections. Enter in your password and connect to your WiFi. Once it shows it is connected, this indicates the printer is connected to your local area network. NOTE: if using bluetooth technology, clearly this simplifies things and you can skip this step.


Testing the Label Printer:
It is crucial to test the label printer before implementation. To do this you will need to first download Brother’s iPrint&Label app. Using this app will tell you if your specific device will work with the label printer and allows you to quickly see and isolate if you have an issue with the printer and your device or the connections you are using. Just download the iPrint&Label app and select one of the templates provided in the app to test printing. If you are unable to print from this app, make sure you are using the same WiFi connection for the printer and your device. Note: if you are unable to print, you will not be able to use the RaceDay CheckIn app.
Configuring Label Printing in the RaceDay CheckIn App:
Now, to configure label printing in the RaceDay CheckIn App.
- First, access your event in the RaceDay CheckIn App.
- Tap the gear settings icon to go into settings.
- Select Race Configurations. Pick the configuration you want to use (make sure to create a custom configuration for your race).
- Select Label Printing and then Enable Label Printing.
- Set up the format for your label, including the label size. The correct setting for the label size is required. If you have the incorrect setting here, the printing will not work. Android devices also have the extra step to select the paper size which is equally as important.
- Under this same area, scroll down to Select Default Printer to select your label printer.
- Adjust device settings to your preferences. These include things like Auto Print After Review to further streamline the check-in process.

Fine-Tuning Label Printing Options:
You have various label printing options to customize the content and appearance of the printed labels. You can adjust font size, style, and alignment. You can add and subtract rows and labels depending on the content you want printed.

More Information
The recorded webinar provides more in-depth guidance and tips. The RaceDay CheckIn app is one of RunSignup’s most valued product offerings and is changing the entire check-in process. Label printing is helping to display custom information – further helping to streamline your check-in experience.
If you think the printer is not working correctly, we encourage you to check with the printer manufacturer for troubleshooting tips. Otherwise, feel free to contact support at info@runsignup.com.