With the release of Websites V2, RunSignup has introduced a Website Builder to streamline the process of adding and organizing content pages. Once you have set style options for your website, it’s time to start structuring your website with pages and menus.
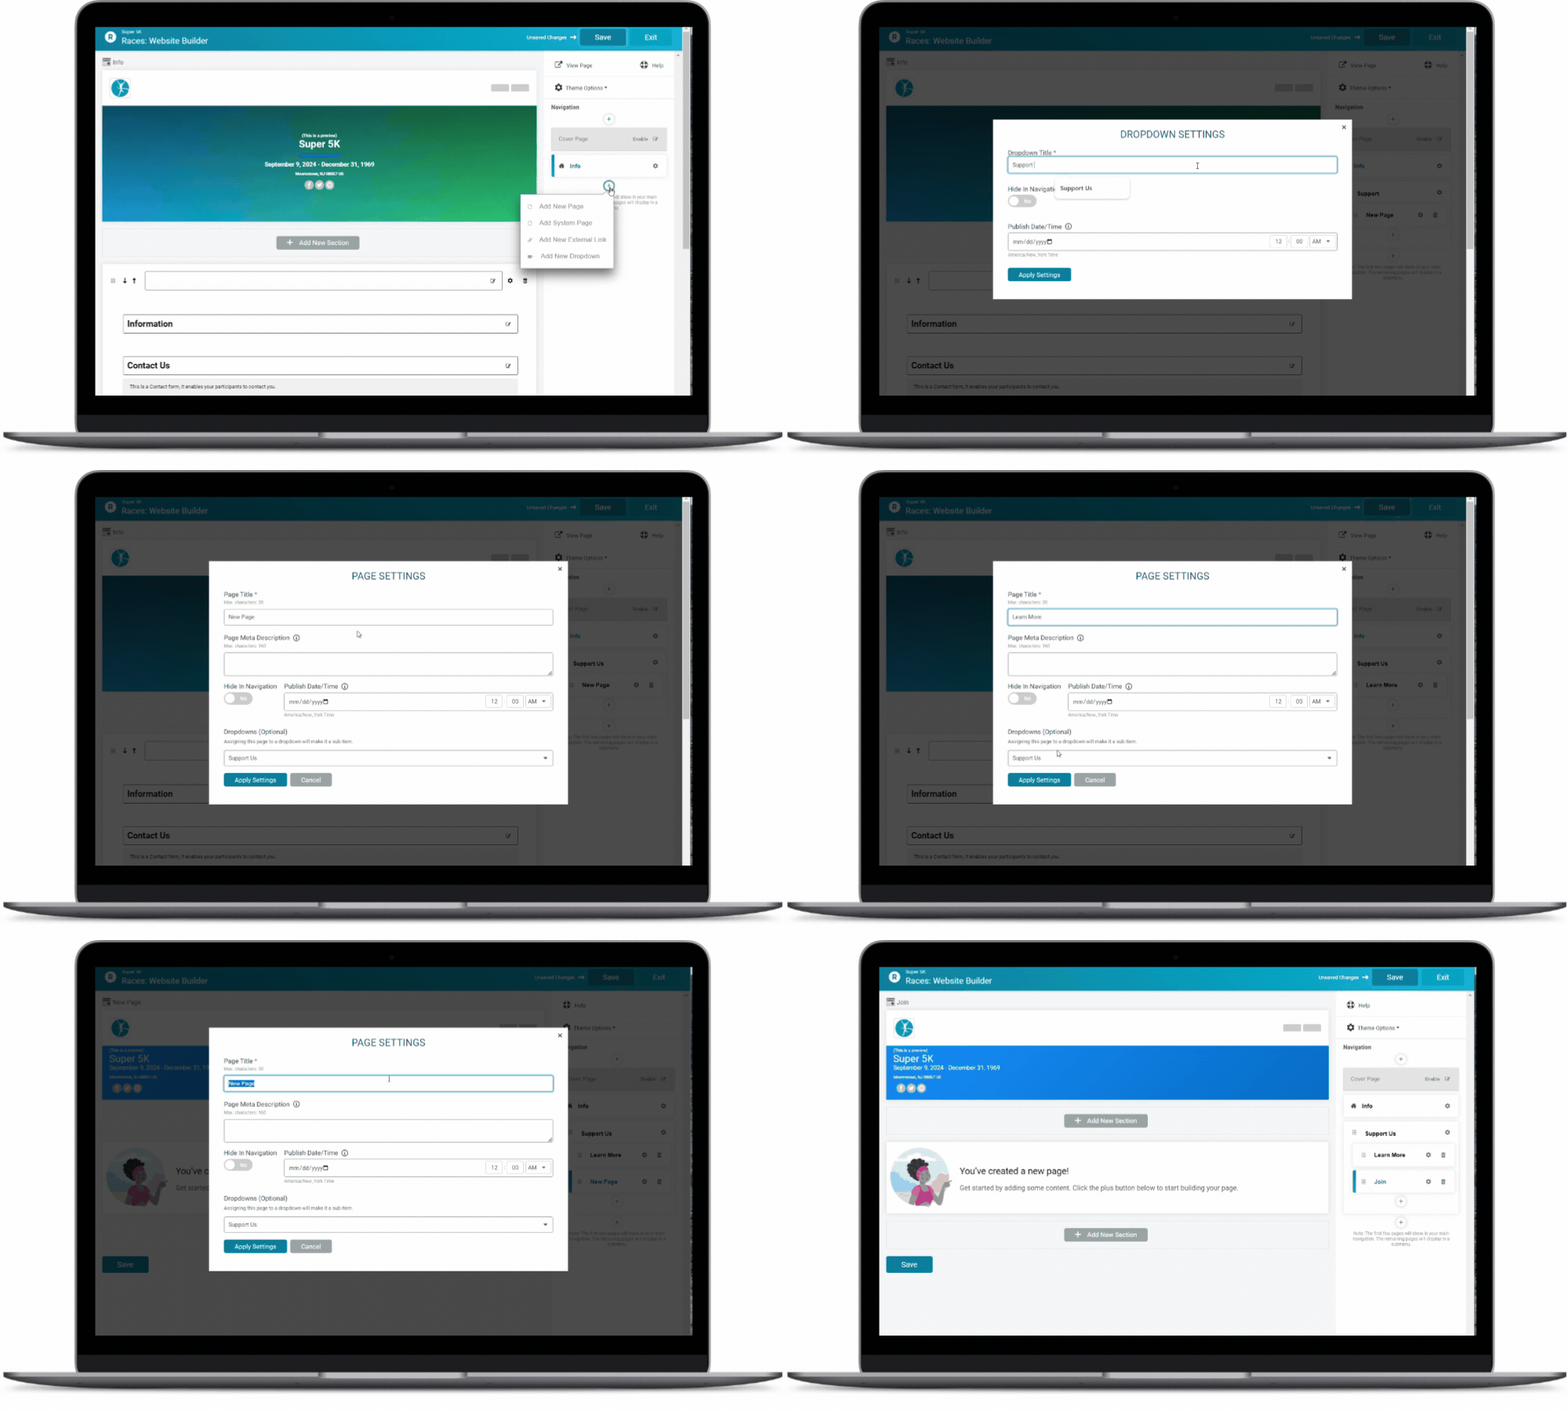
To get started adding menu items and pages, use the Plus sign on the top or bottom of the navigation panel.
Click to jump to a specific section:

Creating a Menu Structure
Your menu is the way you choose to organize your information. If you have only a few pages to add, you can simply add each page (via “Add New Page). Each page will show as it’s own menu item at the top of your website.
Adding Dropdowns
However, if you need more than a few website pages to organize all your information, you’ll want to implement dropdowns. When add a dropdown, it creates the word that you see as the topline menu item. Then you setup additional pages as submenus under that dropdown.

When you add a dropdown, the website builder will automatically create the first page under that dropdown. You can rename the page and then add any number of other pages to the dropdown.

Once you have your pages added, you can rearrange the order of your pages and dropdowns, as well as the order of your pages under each dropdown. Simply click on the grid icon at the left of each menu item to move the page up or down the menu.

To move your page to a different dropdown, click on the gear next to the page title. The dropdown settings are at the bottom of the options.

Dropdown Options
To access your options for dropdown menu items, simply click on the gear icon to the right of the menu title on the website builder. One of our favorite new options with website builder is the ability to quickly toggle to hide content in navigation or to set a publish date/time in the future. You might want to permanently hide a page if it’s something you only want to link to from other pages, or you may want to wait to show content until closer to your event day. For example, you may want to keep race morning logistics hidden until you’ve had time to update it for the current year.

System Pages
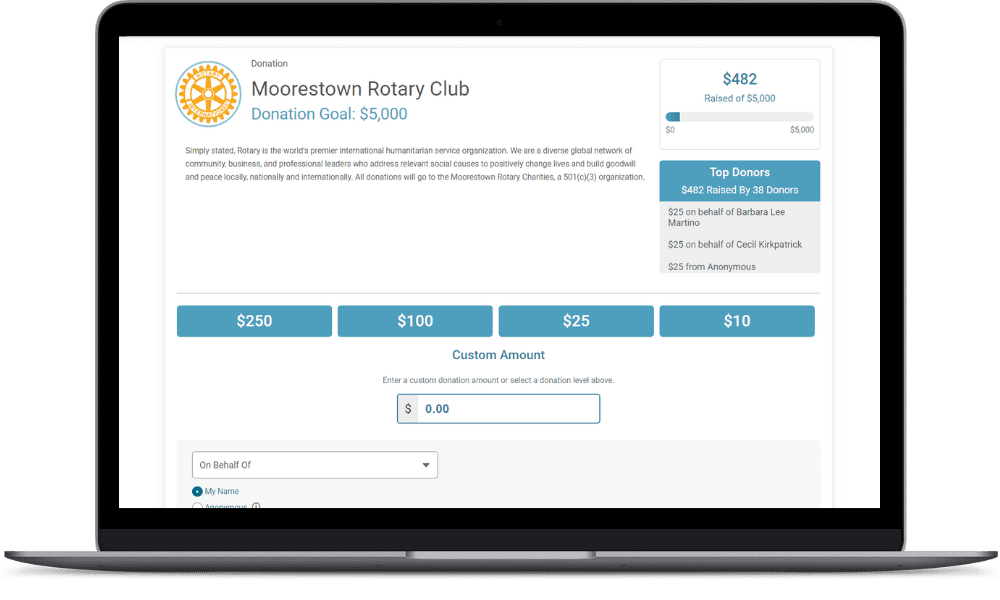
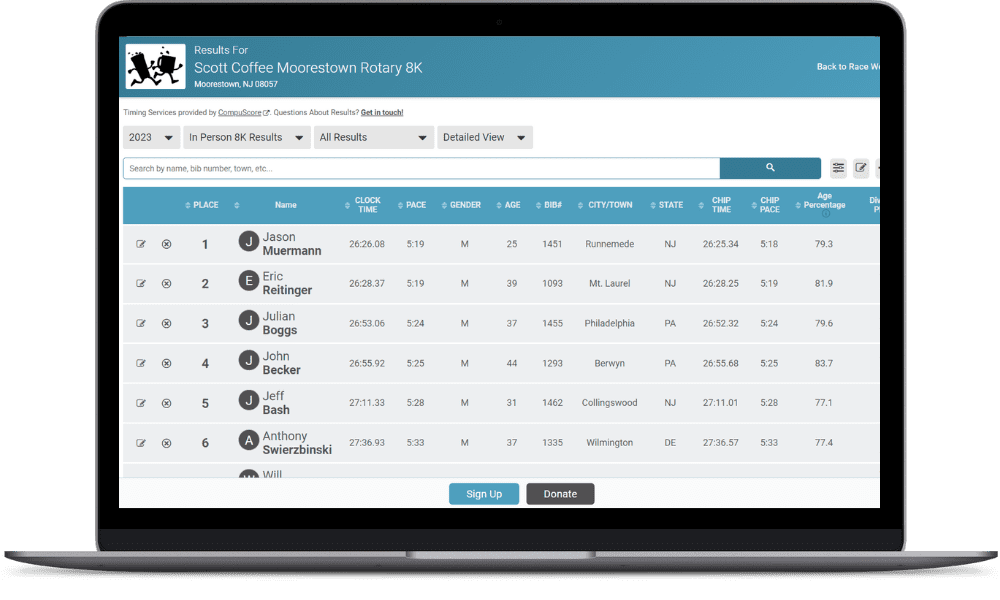
System pages are pages that are automatically created by RunSignup to include key race information. These are not customizable, but instead, are build off of information and features you’ve enabled on your dashboard. Current system pages include Register, Store, Photos, Sponsors, Groups, Corporate Teams, Results, and Volunteer.

Like with dropdowns, you can use the gear icon to access settings for System Pages. This will let you rename the title of the page (such as Volunteer Sign Up instead of Volunteer), set publish settings (for example, publishing the results page on race day), and move the page between dropdowns.
Examples of two System Pages, Donate and Results:


“New Page”: Custom Pages
When you click “New Page” from the Add Button, you’re adding a fully custom page. Unlikely legacy race websites that had limited formatting options for custom content pages, all Website V2 pages can be built out with Website Builder to create dynamic, professional, and fully branded website pages. We have a whole blog about creating your custom pages here, so we’ll keep this part short, but know that selecting “New Page” allows you to create pages as complex (or simple) as you want.
Page Settings
Custom pages, like system pages, have accessible settings via the gear icon next to their name. Like system pages, these page settings allow you to hide the page in navigation, publish it on a specific date, and add a page to a dropdown menu.

There are also two new settings you can access for custom pages. These include:
- Page URL. This refers to the last part of the race URL for the page, and will be automatically populated from the page title if not customized. If needed, you can change it here.
- Page Meta Description: Add a 160 character description of your page. This description is for SEO, and will appear in search engine preview text, making it easier for online searchers to locate the right content on your race website. Your meta description should match the content on the actual page.
External Links
This final option for adding pages is exactly what it sounds like: adding a link to a separate page, off of RunSignup. Simply add the URL for the external site (such as linking to your running club or running store). Anyone who clicks on the menu item will jump to the content on the external website.
If you want to review the full blog series on creating a website with RunSignup Websites V2, please use these links:
